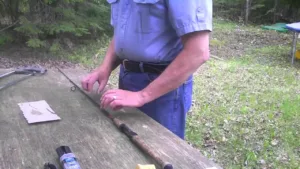
Fixing a broken solid fiberglass fishing rod can be a straightforward process if you have the right tools and materials. Here’s a step-by-step guide on how to do it:

how to fix broken solid fiberglass fishing rod
Materials Needed
- Epoxy resin or a fiberglass repair kit
- Fine sandpaper (around 220 grit)
- Masking tape
- A small brush or a toothpick (for applying the epoxy)
- A piece of fiberglass cloth (if the break is severe)
- A razor blade or a sharp knife
- Optional: A heat gun or a hairdryer
Steps to Fix the Rod
- Clean the Broken Ends: Start by cleaning the broken ends of the rod with alcohol to remove any dirt, oil, or debris. This ensures the epoxy will adhere properly to the fiberglass.
- Sand the Edges: Use the fine sandpaper to lightly sand both ends of the broken rod. This roughens the surface, allowing the epoxy to bond more effectively. Be sure to sand a little beyond the break for a good adhesion surface.
- Align the Pieces: Carefully align the broken pieces as closely as possible to their original position. If there’s a significant gap or the break is jagged, you may need to wrap a small piece of fiberglass cloth around the break area for additional support.
- Apply Epoxy: Mix the epoxy resin according to the manufacturer’s instructions. Use a small brush or toothpick to apply epoxy generously to both ends of the break. If using fiberglass cloth, coat the cloth with epoxy until it’s fully saturated.
- Join and Wrap: Carefully join the two pieces together, ensuring they are perfectly aligned. Use masking tape to wrap the repair site tightly. The tape should be snug but not so tight that it squeezes out all the epoxy.
- Cure: Allow the epoxy to cure as per the instructions on the package. This usually takes at least 24 hours, but it could be longer for maximum strength.
- Remove Tape and Sand: Once the epoxy has fully cured, remove the masking tape. Use sandpaper to smooth out any rough edges or excess epoxy around the repair site. Be gentle to avoid damaging the repair.
- Finish: Optionally, you can apply a layer of varnish or rod finish to the repaired area to protect it and help blend the repair with the rest of the rod.
- Heat Treatment: For added strength, gently heat the repaired area with a heat gun or hairdryer. This helps the epoxy to bond more deeply into the fiberglass. Be careful not to overheat and damage the rod.
Tips
- Practice aligning the pieces before applying the epoxy, so you’re ready to do it quickly once the epoxy is on.
- Work in a well-ventilated area and wear protective gloves when handling epoxy.
- Be patient and give the repair ample time to cure before using the rod again.
Repairing a solid fiberglass fishing rod can often restore much of its original strength and functionality, but it’s important to evaluate the repair based on the severity of the break and the demands of your fishing needs.
 info@unicomposite.com


